Setting Up a MedusaJS Project with Coolify
A step-by-step guide to setting up a MedusaJS project with Coolify.
Medusa is a modern open-source e-commerce framework that helps developers build complex and customized online stores. With its modular architecture and a wide range of built-in features, MedusaJS enables rapid development and easy scaling of e-commerce projects.
Coolify is an open-source self-hosting platform that simplifies the hosting and management of applications. With Coolify, developers can host their projects on their own servers without worrying about setting up and managing the infrastructure.
The combination of MedusaJS and Coolify enables efficient development, deployment, and management of e-commerce projects. In this blog post, I present a step-by-step guide to setting up a MedusaJS project with Coolify.
Prerequisites
Before we begin, a few prerequisites must be met to follow this tutorial:
- Basic knowledge of web development and JavaScript/TypeScript.
- A server with Coolify already installed. If Coolify is not yet installed, you can find the installation guide on the official website.
- A GitHub account.
Optional, but helpful:
- Prior experience with MedusaJS and/or Coolify.
- An existing Medusa project
Preparation (Optional)
Before setting up MedusaJS, we need to install and configure the required databases, as the database credentials will be needed during setup.
On Windows with WSL:
- Install WSL and a Linux distribution of your choice from the Microsoft Store.
- Open the Linux distribution and install Postgres and Redis using your distribution's package manager.
- Start the services and note down the PostgreSQL credentials.
On Linux:
- Install Postgres and Redis using your distribution's package manager.
- Start the services and note down the PostgreSQL credentials.
Installing and Setting Up MedusaJS
Note: If you already have a Medusa project, you can skip this step.
Now we will create a new Medusa project. Make sure you have Node.js and Yarn installed on your computer, then run the following commands to create a new Medusa project and navigate into the project directory:
pnpm dlx create-medusa-app@latest

cd my-medusa-project
If the installation was successful, your .env should look like this:
DATABASE_TYPE=postgres
DATABASE_URL=postgres://postgres:yourpassword@localhost/medusa-5n1w
MEDUSA_ADMIN_ONBOARDING_TYPE=default
STORE_CORS=http://localhost:8000,http://localhost:7001
If a database error occurs with create-medusa-app (e.g. incorrect Postgres credentials), the --skip-db option can be used with create-medusa-app to set up the database after creating the Medusa server. If you use the --skip-db option, you will need to manually enter the database credentials in the .env file.
Changes to medusa-config.ts
In the medusa-config.js file, we need to make some changes to the configuration. Uncomment eventBus and cacheService within the modules object:
const modules = {
   eventBus: {
      resolve: "@medusajs/event-bus-redis",
      options: {
         redisUrl: REDIS_URL
      }
   },
   cacheService: {
      resolve: "@medusajs/cache-redis",
      options: {
         redisUrl: REDIS_URL
      }
   },
};
Redis is a requirement for production deployments! You also need to enable Redis on line 80:
const projectConfig = {
  jwtSecret: process.env.JWT_SECRET,
  cookieSecret: process.env.COOKIE_SECRET,
  store_cors: STORE_CORS,
  database_url: DATABASE_URL,
  admin_cors: ADMIN_CORS,
  // Uncomment the following lines to enable REDIS
  redis_url: REDIS_URL // <-- Uncomment this line
};
Now that we've made the necessary changes to the configuration, we can proceed with testing the Medusa server locally.
Local Testing
Once the databases and the Medusa server are set up, we can test the Medusa project locally. Make sure all configurations in medusa-config.js are correct, then start the Medusa server with one of the following commands:
yarn start
# or
medusa develop
Now visit either the admin panel at http://localhost:9000/app (when using yarn start) or http://localhost:7001 (when using medusa develop).
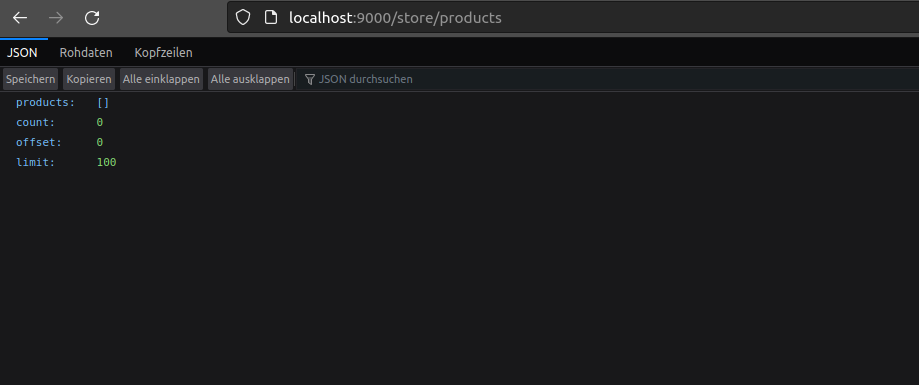
You can also hit the product endpoint of the server to test if you get a response: http://localhost:9000/store/products
Uploading the Project to GitHub
After creating your Medusa project, the next step is to push the project to GitHub. Depending on the development environment or tool you use, the process for uploading the project to GitHub may vary. Regardless of the method you choose, you should end up with a new GitHub repository containing your Medusa project.
Setting Up Coolify Services
Coolify provides a convenient way to self-host and create all the services needed for a Medusa server, including Postgres, Redis, Meilisearch, and more. In this section, we will set up the required databases for our Medusa project on Coolify.
Creating Databases
- Log in to your Coolify server.
- Navigate to "Create new resource" and select "Databases".
- First select "Postgresql" from the list of available database types. Follow the instructions, then start the database.
- Repeat the same process for Redis by selecting "Redis" from the list of available database types.
The databases are now ready and running, and we can proceed with setting up our Medusa project on Coolify.
Setting Up the Medusa Server on Coolify
Now that the required databases are set up and running, we can set up the Medusa server on Coolify.
Creating the Application
- Navigate to "Create new resource" and select "Application".
- Under "Integrated with Git App", select the account where the Medusa project was pushed.
- Select the corresponding repo and branch, and click "Save".
- In the next step, select the Build Pack. Since Medusa runs on Node.js, select "Node.js" from the list of available Build Packs.
Configuration
- Provide an FQDN URL where the server will be accessible, e.g. medusa.yourdomain.dev (make sure the correct DNS records are set up).
- Enable the toggle "Generate SSL for www and non-www?".
- In the "Configurations" section:
- Enter the build and install commands.
- Set the Node version under "Deployment Image" to the desired version if necessary.
- Click "Save" at the top to save the configuration.
Adding Secrets
- Navigate to "Secrets" in the left sidebar.
- Enter the .env variables: For
REDIS_URLandDATABASE_URL, you can copy and paste the connection string from the two databases started earlier.
Note: If you have trouble connecting Redis to the Medusa server, you most likely need to add a colon to the connection string. For example, redis://BCDK9... should be changed to redis://:BCDK9....
Deployment
To deploy the Medusa server, follow the steps below:
- Navigate to "Build" in the left sidebar and check "Enable debug logs".
- Then click "Deploy" in the top right and watch the deployment process.
If no build issues occur during the deployment process, the deployment is successfully completed and the server is accessible at the specified FQDN URL.
Summary and Conclusion
In this tutorial, we walked step by step through the process of setting up a MedusaJS project with Coolify. We covered the necessary prerequisites, prepared the databases, set up and tested the Medusa project locally, and finally deployed the project on Coolify.
By using Coolify, developers can take advantage of a self-hosted system while reducing the complexity of infrastructure management. MedusaJS and Coolify together form a powerful and flexible solution for developing, deploying, and managing e-commerce projects.
Congratulations! You now have a running MedusaJS project hosted with Coolify. With the knowledge gained, you can now start developing and optimizing your own online store. The possibilities are endless, and there is still much more to discover and learn in the world of MedusaJS and Coolify.
Good luck with your new MedusaJS project!